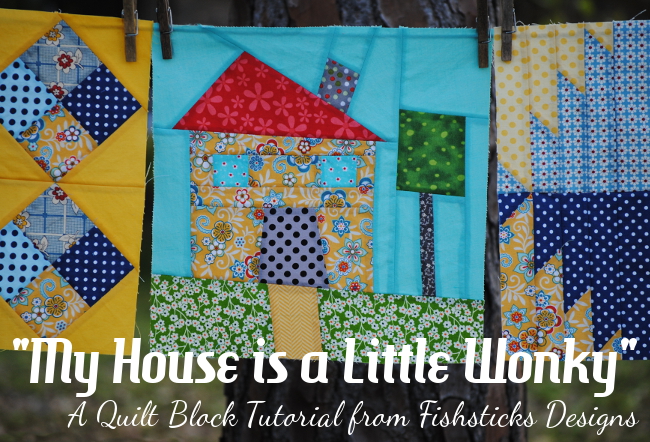
 Welcome to the Fishsticks Designs Blog’s first quilt block tutorial! I am so excited about getting to be a part of the Around the Block Round Robin at Patchwork Posse! When Becky asked me if I’d like to join in by sharing my favorite quilt block, I knew right away what block that would be. I’m calling it the “My House is a Little Wonky” Block.
I love the whimsical nature of wonky house blocks, and the fact that they’re perfect in their imperfection. This block has no picky corners to be aligned perfectly, and it lets you use your imagination a bit. My husband retired from the Air Force about eight years ago after 20 (“and a half!” he would add) years, and we’ve lived in a lot of houses. With each move, I immediately started decorating to turn our house into our home. One of the things all of that decorating taught me, is that no house is ever perfectly straight . . . ever. It’s not really visible from the outside or with a casual glance, sometimes you even have to climb up into those dark corners to find out that the walls are slightly crooked, but they always are. I think there’s a little life lesson in that. In spite of how we might look from the outside or at a casual glance, we’re all a little wonky, just like our houses. It’s a good thing, too. If we weren’t, life would be far too boring!
Ready to get started? The tutorial for this freezer-paper-pieced block looks really long, but I promise this block is not hard to assemble at all. I’ll walk you through every step!
You’ll need a few things before you get started. First, you’ll want to print this color template for your house block: Color Template. Be sure when you print that you’ve chosen to print at full-size or 100%. You may have to save the file to your computer to print it. (There’s a black and white template shown below, too. Don’t worry about printing it right now, but you may need it later: Black & White Template.) In addition to your regular quilting supplies, since this is a freezer-paper-pieced block, you’ll need some freezer paper. (Iron Man is totally optional, however. When you live in a house with little boys, and you walk away from your supplies, you often come back to find tiny visitors.) To assemble your color template, just trim the 1/2″ margin off of the left hand side of the bottom right corner page.
 Overlap the bottom right corner page with the bottom left corner page. Line everything up and tape it in place.
 Piece the top two pages together in the same manner, and then tape all four pieces together.
 Check to make sure that your template measures 12 1/2″ square before moving on.
 Cut a piece of freezer paper slightly bigger than your template and place it shiny side down/matte side up on top of your template. (If you find that it’s too difficult to see through the freezer paper, you can print the black and white template for tracing instead.)
 Using a pencil and straight edge, trace the template onto the matte side of the freezer paper.
 Use the color template to label all of the pieces. You’ll see that the block is divided into four sections, and the colors are labeled from left to right and from the bottom up. Using abbreviations will help this part to go faster.
 Choose your fabrics! This is a great time to use up tiny scraps. They are perfect for windows, doors, chimney, etc.
 Cut your freezer paper template into pieces.
 Separate the template pieces into colors/fabrics.
 Now the fun part starts! Position one of your template pieces on the fabric you’ve chosen for it with at least 1/4″ margin all the way around. Be sure that you’ve placed the template on the right side of the fabric with the shiny side of the freezer paper down. With your iron set to cotton/no steam, press the template onto the fabric. The coating on the shiny of the freezer paper will melt and the template will temporarily stick to the fabric.
 To add your 1/4″ seam allowance, place your clear quilting ruler on top of your template/fabric piece. Line the 1/4″ marking up with the edge of the template so that the ruler overlaps the template, as shown.
 Run your rotary cutter down the edge of the ruler to trim away the excess fabric, leaving the 1/4″ seam allowance outside the template.
 Cut each side of your fabric in the same manner so that you have a finished fabric piece with the template still attached and a 1/4″ seam allowance all the way around it. (Don’t take your templates off yet!)
 Where you have multiple templates for one piece of fabric, you can iron them all on at once, but be very careful to make sure you have 1/2″ (1/4″ times two) between all of the pieces. It’s best to put more than that, just in case.
 Continue ironing your templates onto your fabric and using your ruler and rotary cutter to trim away the excess fabric leaving 1/4″ seam allowance all the way around each template. Once you’re finished, separate them all into their individual sections.
 The remaining pictures will walk you through the order in which to assemble your pieces. Remove the templates as you get to each piece. Stitch the pieces together using 1/4″ seam allowance and press your seams (open or to one side, whichever you prefer) before moving on to the next fabric piece.
 Start by sewing the Section 1 grass pieces to either side of the path.
 Assemble Section 2 next — the house, including doors and windows.


 Move onto Section 3 which includes the roof, chimney and sky pieces.


 Finally, sew the Section 4 tree pieces together.


 Now you’re ready to sew your sections together!


 Almost done! Just square your block up to 12 1/2″ and admire your work. That wasn’t hard at all, right?
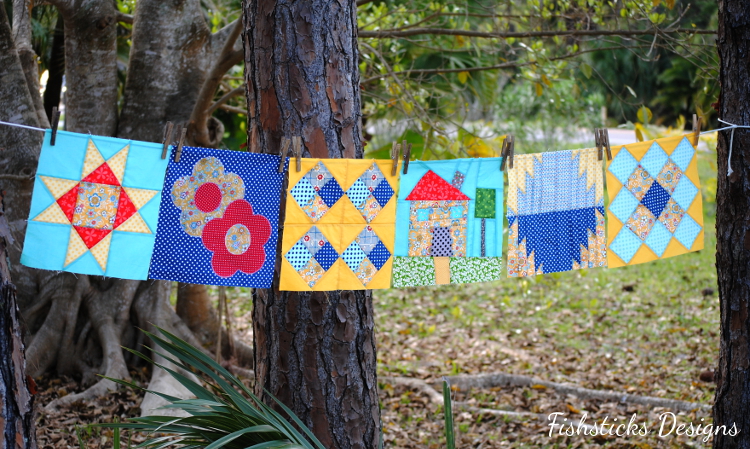
 I can’t wait to see your finished blocks! I’ve been having such a great time sewing along myself. Want to see my blocks so far? I love how they’re coming together!


Love the only house. Can’t wait to get started.
So cute! I love how your quilt is coming along. xoxo
Love the house block!
This is so cute! Your directions are so clear and helpful, thank you!
I love it, I have never tried to piece an actual scene. I am a neophyte and have only ever pieced geometric shapes, this looks fun!
Oh what a great pattern and instructions. So glad it wasn’t paper piecing.
It is so generous of you to provide this pattern and tutorial for free. Thank you from the bottom of my heart. God Bless you and your family.
Thanks for the pattern. I downloaded it.
I have noticed you don’t monetize your website, don’t waste your traffic, you can earn extra cash every month.
You can use the best adsense alternative for any type of website (they approve all websites), for more info simply
search in gooogle: boorfe’s tips monetize your website